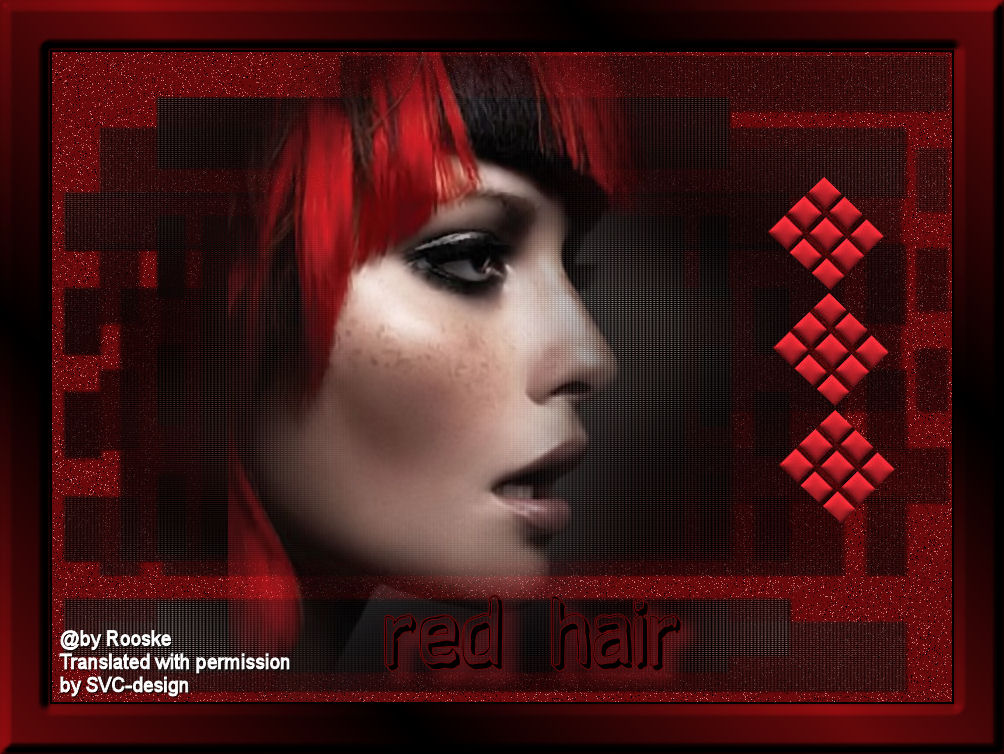

This lesson is made with PSPX9
But is good with other versions.
© by SvC-Design

Materialen Download :
Here
******************************************************************
Materials:
12479954953_femmes[1].psp
deco -rooske.png
gazzarelli.ttf
image 6.png
******************************************************************
Plugin:
NO
******************************************************************
color palette
:

******************************************************************
methode
When using other tubes and colors, the mixing mode and / or layer coverage may differ
******************************************************************
General Preparations:
First install your filters for your PSP!
Masks: Save to your mask folder in PSP, unless noted otherwise
Texture & Pattern: Save to your Texture Folder in PSP
Selections: Save to your folder Selections in PSP
Open your tubes in PSP
******************************************************************
We will start - Have fun!
Remember to save your work on a regular basis
******************************************************************
1.
Open a new transparent image of 900x 650 pixels
Fill your image with foreground color
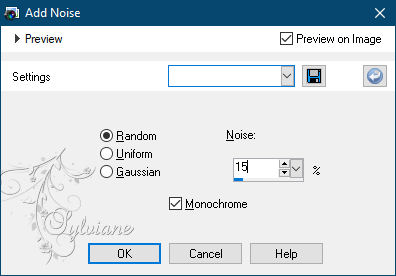
Adjust - Add / Remove Noise - Add Noise

2.
Selection - Select All
Open image 6.png
Edit – Copy
Edit - Paste into selection
Selection - Select None
Open 12479954953_femmes[1].psp
Edit – Copy
Edit - Paste as new layer
place it like in the example
open deco -rooske.png
Edit – Copy
Edit - Paste as new layer
Put right above
3.
Layers – Duplicate deco layer and slide down .
Duplicate again and slide down.
Arrange these layers nicely as in the example.
Layer – merge – merge all (flatten)
4.
Activate your text tool and set your font to Gazzarelli, size 48.
Type the text Red Hair.
Put down convert layer to raster layer.
Effects - 3D effects - Drop shadow
9-9-61-23 color: #cc262f.
Layers – merge – merge down
5.
Image - Add Borders - 2px – color: black
Image - Add Borders - 50px - color: white.
Select the white border with your magic wand.
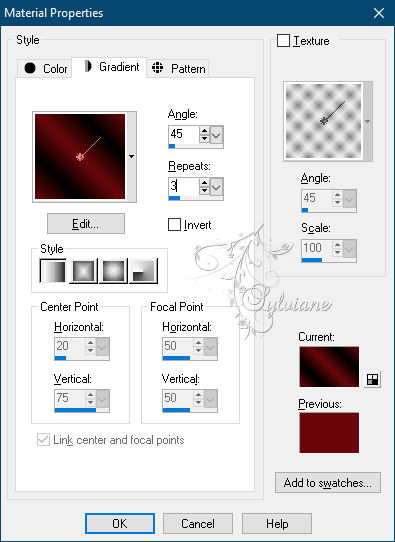
Fill with gradient :linear angle 45, repeat 3

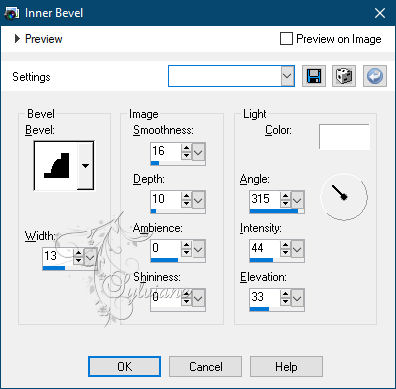
Effects – 3D effects – inner bevel

Selection - Select None
6.
Put your name on your creation and make it custom.
Save your work as JPG.
Back
Copyright Translation © 2021 by SvC-Design